
The Sales Inventory screen gives you a method to view/track certain line items that you have flagged as a Sale Item (or one time charge). Only these items will be used when you create a Sales Ticket, but can be used on rental tickets as well. You should establish your Sales Categories first - Clothing, Signs etc. – before setting up new Sale Items.
Sale items are really just a subset of Line Items and will be displayed with the same information when the form is opened.
If you sell the same items that you also rent, you will need to set up a separate line item for the sale item. The reason for this is twofold - you are probably posting sales to a different income account, and as a sale item, it is a one time charge and you do not want it to bill like a recurring rental item.
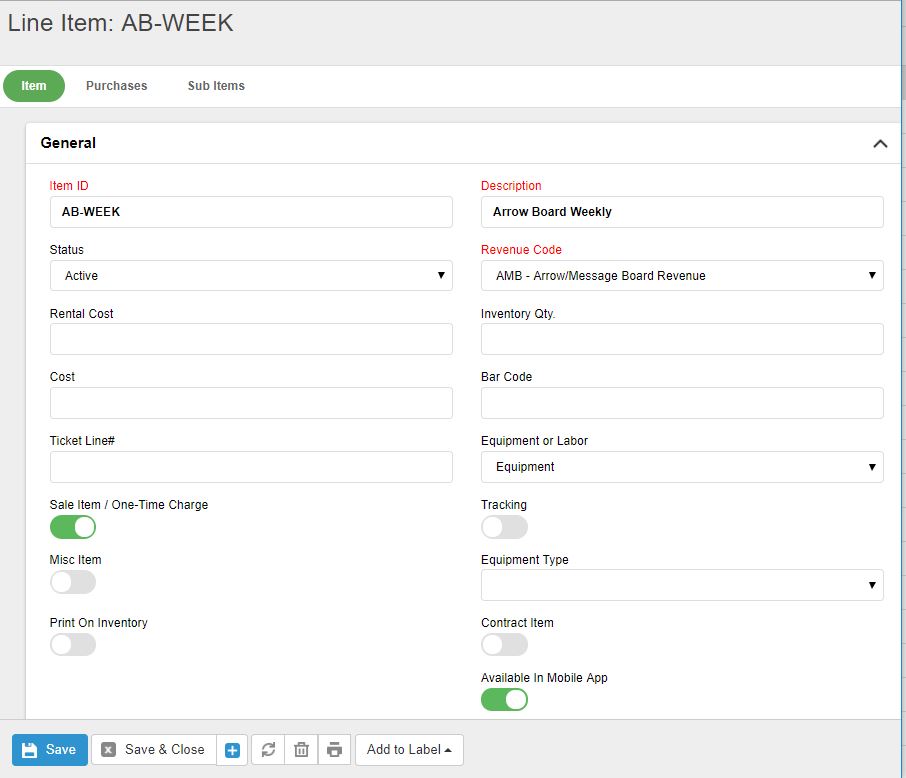
Item ID: You must enter a unique Item ID. Dashes are allowed to refine your items. Many customers will use a -S after the item id to differentiate between a rental item and a sale item. Or start them with a Z- so they all fall to the bottom of any list of items and are grouped together.
Description: Enter a description that best describes the item. This will be the default on the Price List and therefore the Invoice. You will be able to change it on the Price List if necessary.
Status: Since you cannot delete items that have been used on a ticket, if you have an item that you no longer use or carry, simply change the status to Inactive. This will prevent the item from being added to any new tickets.
Revenue Code: This refers to the revenue code set up in the Chart of Accounts and is required for every line item you setup. Every line item must be associated with a revenue account so that when invoices are exported they are properly applied to your accounting software’s G/L. Each item can have only one revenue code associated with it. If you use an item for more than revenue source then you need to set it up twice with the proper description so the dispatcher will know which to choose.
Rental Cost: Not applicable to Sales items so leave it blank.
Inventory Qty.: This number represents your total inventory quantity. You can manually update this number or use the Purchases tab to add new inventory. Any items that are invoiced, will automatically reduce this inventory qty. The only report this field is used on is the Total Equipment On Site. The program will take your total inventory quantity and subtract what is on site to arrive at the quantity of equipment in your yard/shop.
Item Value/Cost: Optional. There is a report that will list all your total equipment on site. If you enter a value into this field, you will have a good estimate of the value of the equipment on site. This is an estimated value, not necessarily the exact cost.
Ticket Line#: The Ticket Line# allows you to assign which items will appear on your tickets. 1 – 16 appear in the 1st column, 17 – 34 in the 2nd column and 35 – 40 in the 3rd column. These items will print on the ticket regardless if the items are part of the order. The benefit of using this option is a driver does not have to hand write items that he has delivered if they were not on the order but were needed. These are usually the most frequently used items.
Equipment or Labor: Every item will default to Equipment. If you change it to Labor, the line item will appear in the lower section of the invoice and subtotal as Labor charges. Any sale items or one time charges should be setup as Equipment. Labor is always a one time charge.
Sale Item: Check this field if the item is a Sale Item or One Time Charge, meaning that on the invoice it is displayed for just one day, it does not carryover from day to day like equipment rentals. It will also appear in the One-Time Sale item section on the summary page of the invoice.
Tracking Item: For Arrow / Message boards that have a serial / tracking number be sure to check this field. This will allow you to enter those tracking numbers when editing your tickets. You can then print various reports to show which job sites the equipment has been at. It will also allow you to finding missing equipment if the data has been entered properly.
Misc. Item: Sometimes you want to establish an item that you will want to arbitrarily change the description or price at the time you create a ticket. You still need to set these items up but they do not appear on the price list. On the ticket, the dispatcher can change the description and price. Only those items you have marked as Misc. Item will be found in the drop down list.
Contract Item: This field is for internal use and does not indicate if the item is used on contract jobs, so only a couple line items may be checked as contract. If you setup Monthly or Daily Contracts on the Job screen, you will need to setup a special line item for that contract. Only those items marked as Contract will appear on the drop down list on the job screen. For example, Monthly Traffic Control might be setup as a contract item.
Print On Inventory: You can determine if an item should print on your inventory count sheets.
Purchase Details - optional:
Default Sales Price: If you add a sale item to a ticket and it is not on the price list for the job, it will default to this default sales price.
Vendor: This is the vendor who you normally by this item from.
Vendor Order#: The vendor’s order number for this item.
Category: Categorize the item so that it will be grouped on the report properly.
Purchase tab - optional:
With the Equipment Module you have the ability to track purchases within TCR. By entering purchases, TCR will automatically increase the Inventory Qty field. It also gives you the option of changing default vendors or cost of the item.
Sub Items tab - optional: would not be used for sale items
0 Comments